Create a menu and add your menu items
Updated 31 Oct 2026
You build a menu in two parts: a short 4-step setup that names the menu and adds your first few items, then the menu page, where you add the rest and fill in photos, dietary tags and sections. A first menu with a handful of items takes about 5 minutes.
Everything saves as you go, and nothing is locked. You can change any of it later.
Before you start
- Have your item names and prices ready (a printed menu, a price list or a spreadsheet is fine).
- Photos are optional, but menus with photos sell better. Landscape shots of the food work best.
- Already have your menu written down as a PDF, photo or Word doc? See Upload a menu you already have at the bottom. CaterCloud can read it and build the menu for you.
Part 1: Create the menu
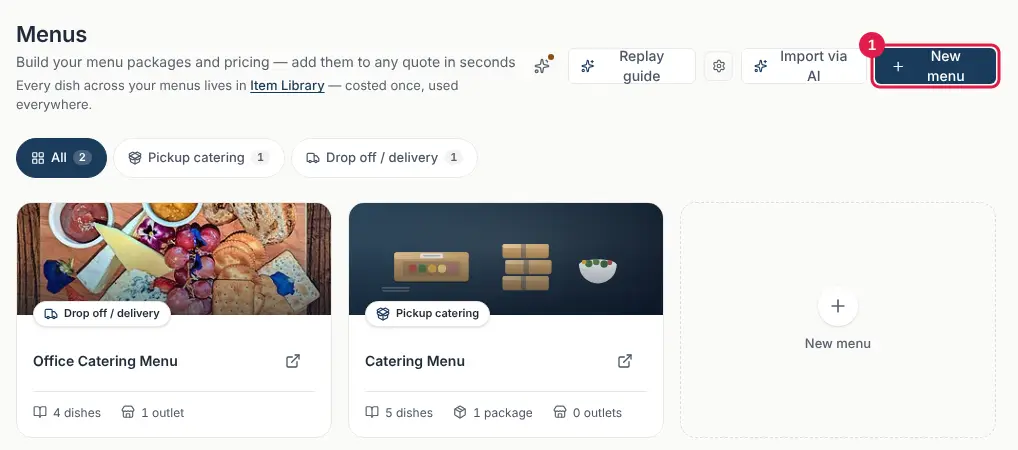
- Click Kitchen in the left menu to open Menus, then click New menu in the top right.
- Pick the kind of catering this menu is for, for example Drop-off & platters. Clicking a card takes you to the next step.
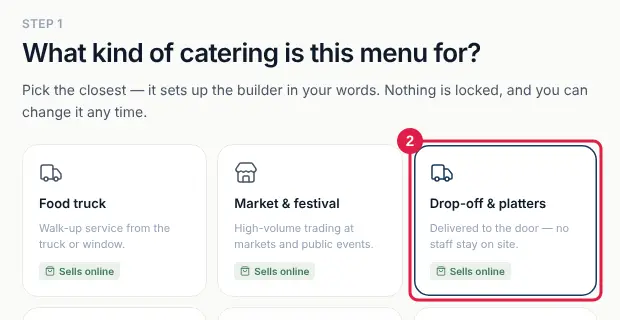
Each card says either Sells online or Quoted per event:
- Sells online: every item has its own price, so customers can add it to a cart on your ordering page.
- Quoted per event: the menu is priced per head and goes out through your Date & Price Checker instead.
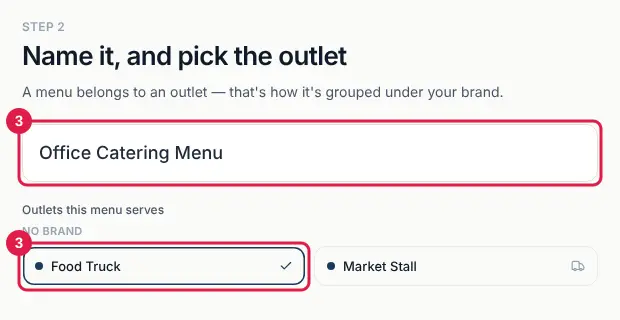
- Type a name for the menu (for example
Office Catering Menu), click the outlet or outlets that serve it, then click Next.
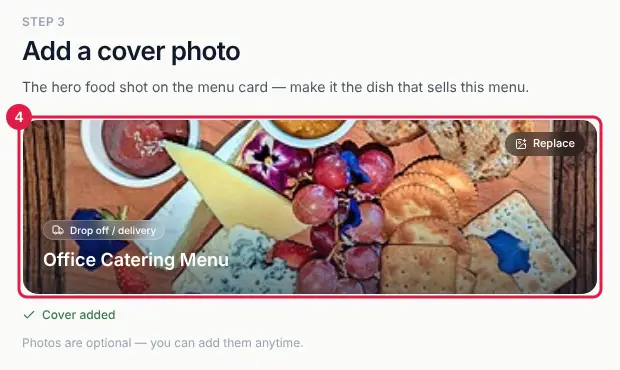
- Click Upload cover photo and choose your best food photo. This is the big picture at the top of the menu. It's optional, so you can click Next and add one later.
- Add your first few items: type each item's name and price. Click the small arrow on a row to add a short description and dietary tags (Vegan, Veg, GF, DF, Spicy, Nuts, Halal, Kosher). Click Add another item for more rows.
- Click Create menu.
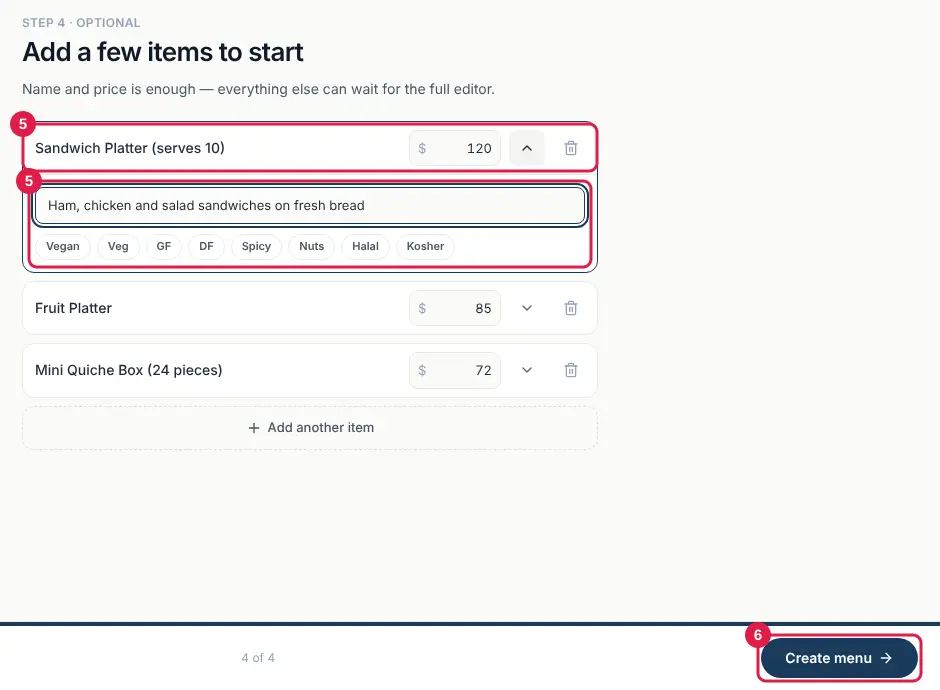
Your menu opens on its own page. That's where you add the rest of your items.
Part 2: Add more items
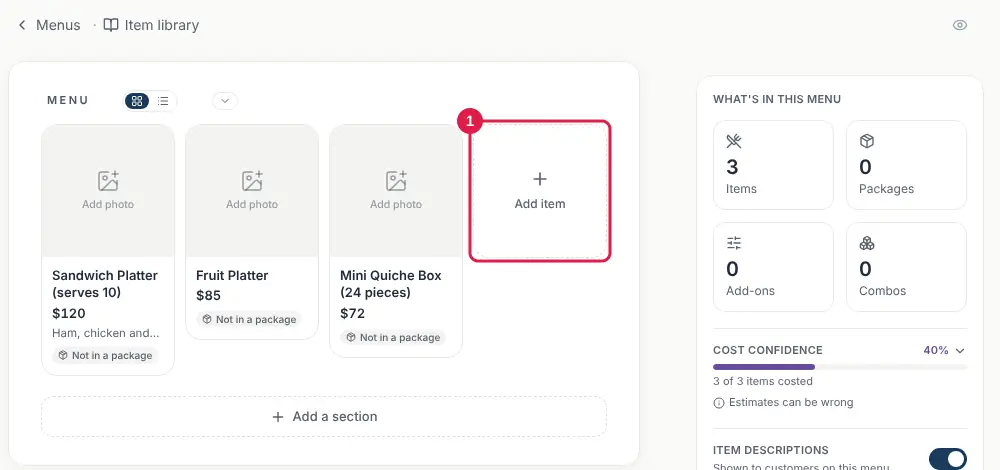
- On the menu page, click the dashed Add item card.
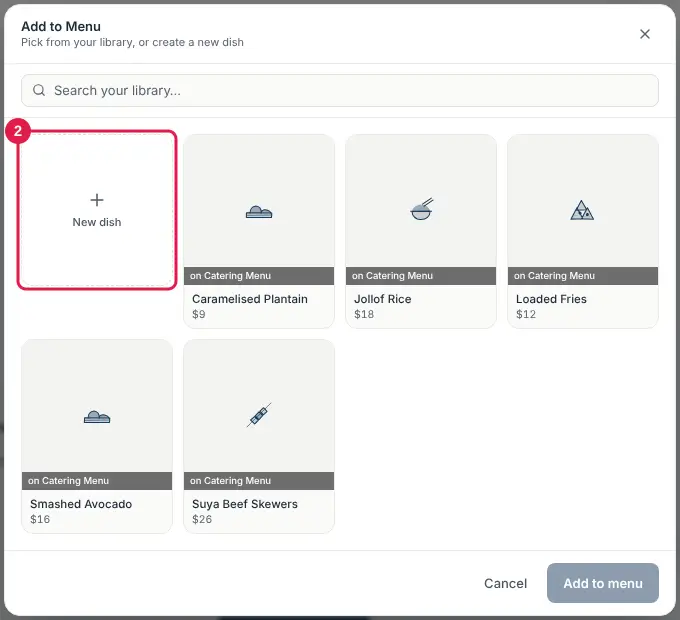
- A window opens showing the dishes you already have on other menus. Click one to reuse it and then click Add to menu, or click New dish to make a new one.
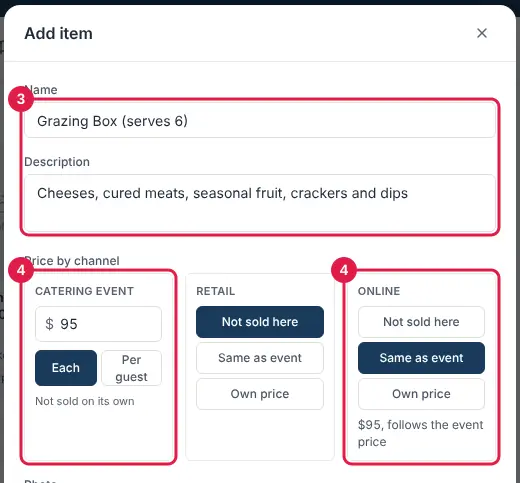
- Type the Name and a Description. The description is what customers read, so say what's in it.
- Set the price under Price by channel:
- Catering event: click Sell on its own, type the price, then choose Each (one price per box, platter or tray) or Per guest (multiplied by the number of guests).
- Online: choose Same as event to sell it on your online ordering page at the same price, Own price to charge something different online, or leave it on Not sold here.
- Retail: the same three choices, for selling at your truck or stall.
- Under Photo, click Drop image or click and choose a photo of the dish, or click Choose from library to reuse one you've already uploaded.
- Under Dietary, click every tag that applies. A tag turns bold when it's on.
- Leave Availability on In stock, unless the item is sold out or you want to hide it for now.
- Click Add item.
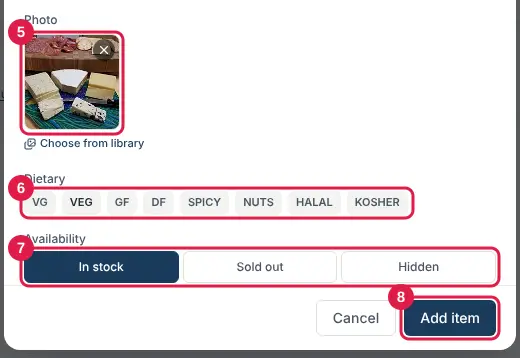
The item appears on your menu straight away, with its photo and price.
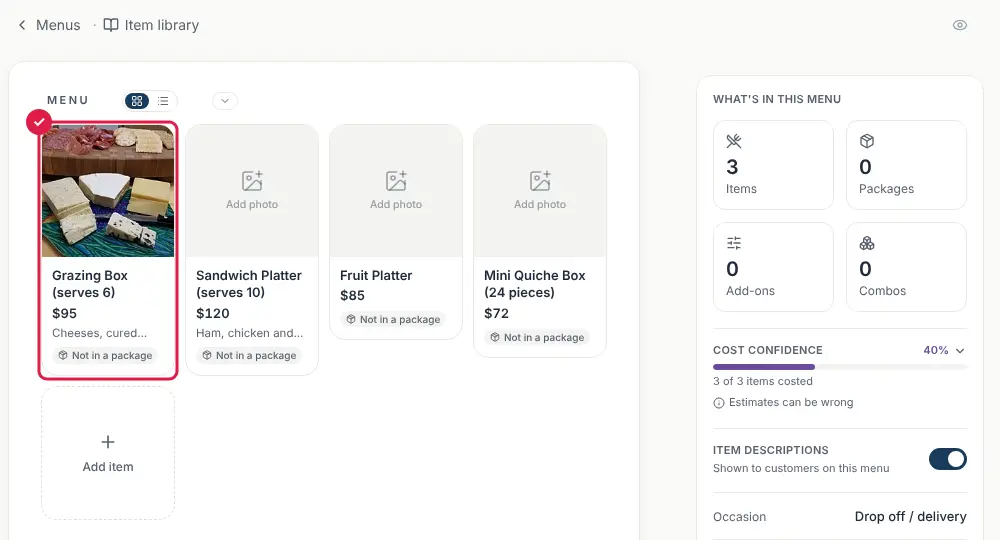
What the dietary tags mean
- VG: vegan
- VEG: vegetarian
- GF: gluten free
- DF: dairy free
- SPICY: spicy
- NUTS: contains nuts
- HALAL: halal
- KOSHER: kosher
Customers rely on these, so keep them accurate.
Change an item
Click the item on your menu to open Edit item. Change whatever you need. Changes save as you type, so click Done when you're finished.
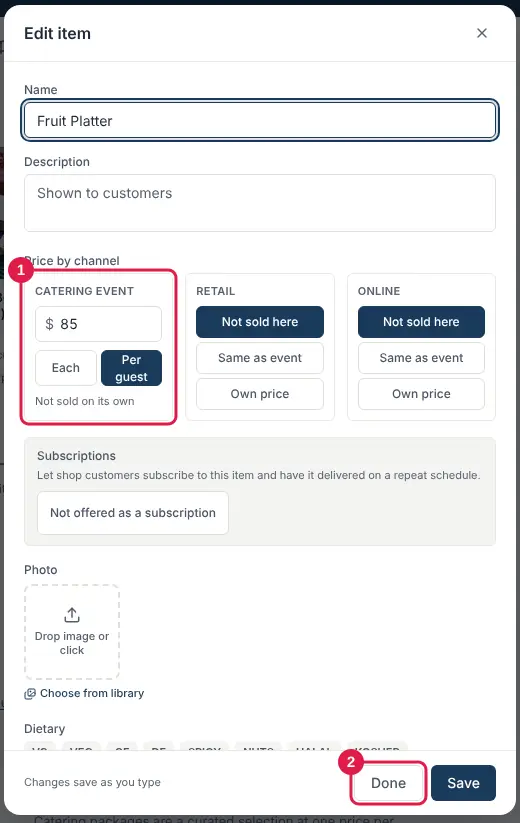
Items you added during Part 1 don't have a photo yet, so open each one to add it (and a description, if you skipped it). While you're there, check Each or Per guest under Catering event: a platter or box is usually Each.
Sort items into sections
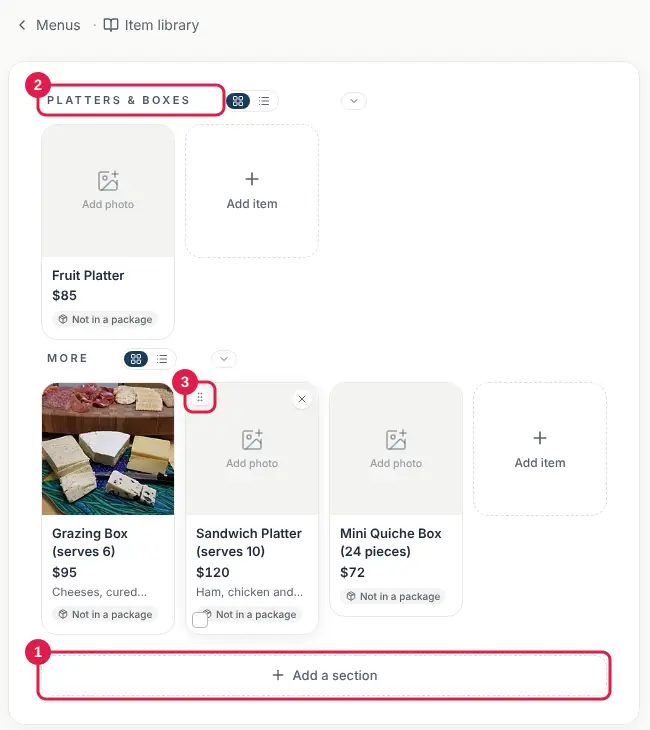
Sections are headings on your menu, such as Platters & Boxes, Sandwiches or Sweets.
- Click Add a section under your items, type the section's name and press Enter.
- To rename a section later, click its name.
- Hover over an item to show the small dotted handle in its top left corner, then drag the item by that handle into the section you want. Drag items up or down to change their order.
Sold out or hidden items
Open the item and change Availability:
- Sold out: keeps the item on your menu but marks it as sold out.
- Hidden: takes it off your ordering pages completely until you switch it back to In stock.
Add what each item costs you
Enter what each item costs you to make and CaterCloud shows your margin on it. That has its own guide: Add your item costs (and see your margins).
Upload a menu you already have
If your menu is already written down, you don't need to type it in:
- On the Menus page, click Import via AI, or
- In the New menu setup, click Already written down? Upload it instead.
Upload a PDF, a photo, a Word doc or a link. CaterCloud reads it and builds the menu for you to check. Look over the prices and dietary tags before you use it.
Check how it looks
On the menu page, click Preview as a customer on the right to see the menu the way your customers will.
Still stuck? Open the chat assistant (bottom-right) for help with your specific setup.